A small laundry room does not need more cabinets, more baskets, or a bigger budget to work better. It needs a clear system: dirty clothes have a defined destination, clean laundry has a temporary home, supplies stay close to the machines, and the floor remains easy to access.
The most useful small laundry room organization ideas are therefore less about filling every inch and more about giving each part of the room one clear job. This guide builds that system from the measurements up, with practical zones, vertical storage, folding space, supply control, and a maintenance routine that can survive a busy week.
1. Measure the Laundry Room Before Buying Storage
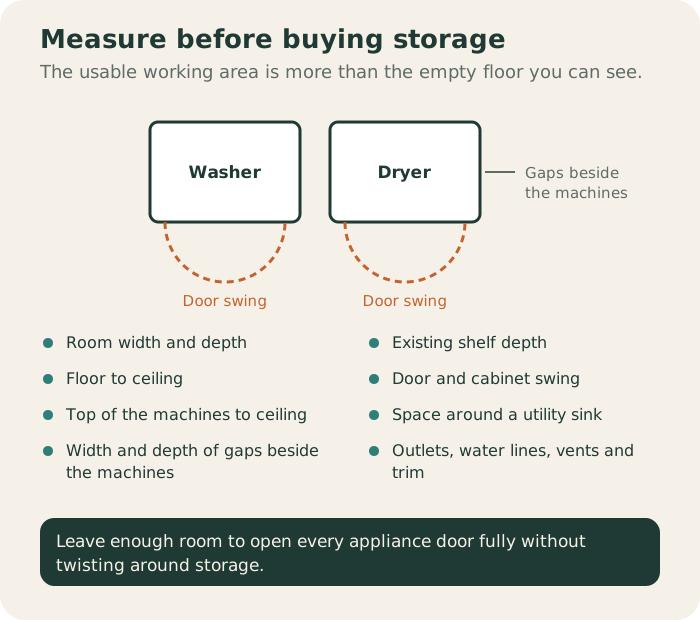
Start with a tape measure rather than a shopping list. Record the room width and depth, then measure the distance from the front of each appliance to the opposite wall. This is the usable working area, not just the empty floor visible around the machines.
Measure the vertical space as well:
- Floor to ceiling
- Top of the machines to ceiling
- Width and depth of gaps beside the machines
- Existing shelf depth
- Door and cabinet swing
- Space around a utility sink
- Location of outlets, water lines, vents, and trim
The appliance doors deserve special attention. A shelf that looks perfect while the machines are closed can become an obstacle when a washer door opens into the room. Measure the full door swing and leave enough room to load and unload without twisting around storage.
For more small-space planning ideas, compare this approach with our guide to small apartment organization and storage .
The rule is simple: measure the empty space first, then choose storage that fits the space. Do not buy a container first and hope it works later.
2. Create Three Simple Laundry Zones
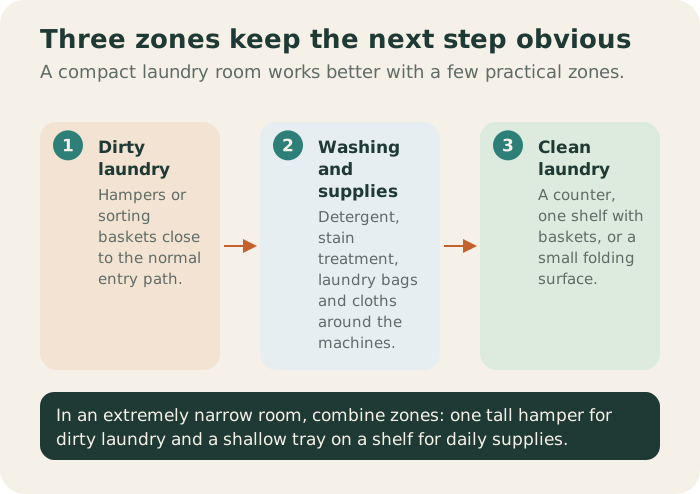
A compact laundry room becomes easier to maintain when you divide it into a few practical zones instead of many tiny categories.
Dirty-laundry zone: This is where clothes arrive before washing. Put hampers or sorting baskets as close as possible to the normal entry path.
Washing and supply zone: This belongs around the machines. Keep detergent, stain-treatment supplies, laundry bags, and frequently used cloths within easy reach.
Clean-laundry zone: This is a temporary landing place for clean clothes before they are folded and returned to their rooms. It might be a counter above front-loading machines, one shelf with baskets, or a small folding surface.
If the room is extremely narrow, you can combine zones. For example, one tall hamper can handle dirty laundry while a shallow tray on a shelf holds daily supplies. The purpose of zoning is not to create a perfect diagram; it is to make the next action obvious.
3. Use the Wall Above the Machines
The wall above a washer and dryer is often the most valuable unused area in a small laundry room.
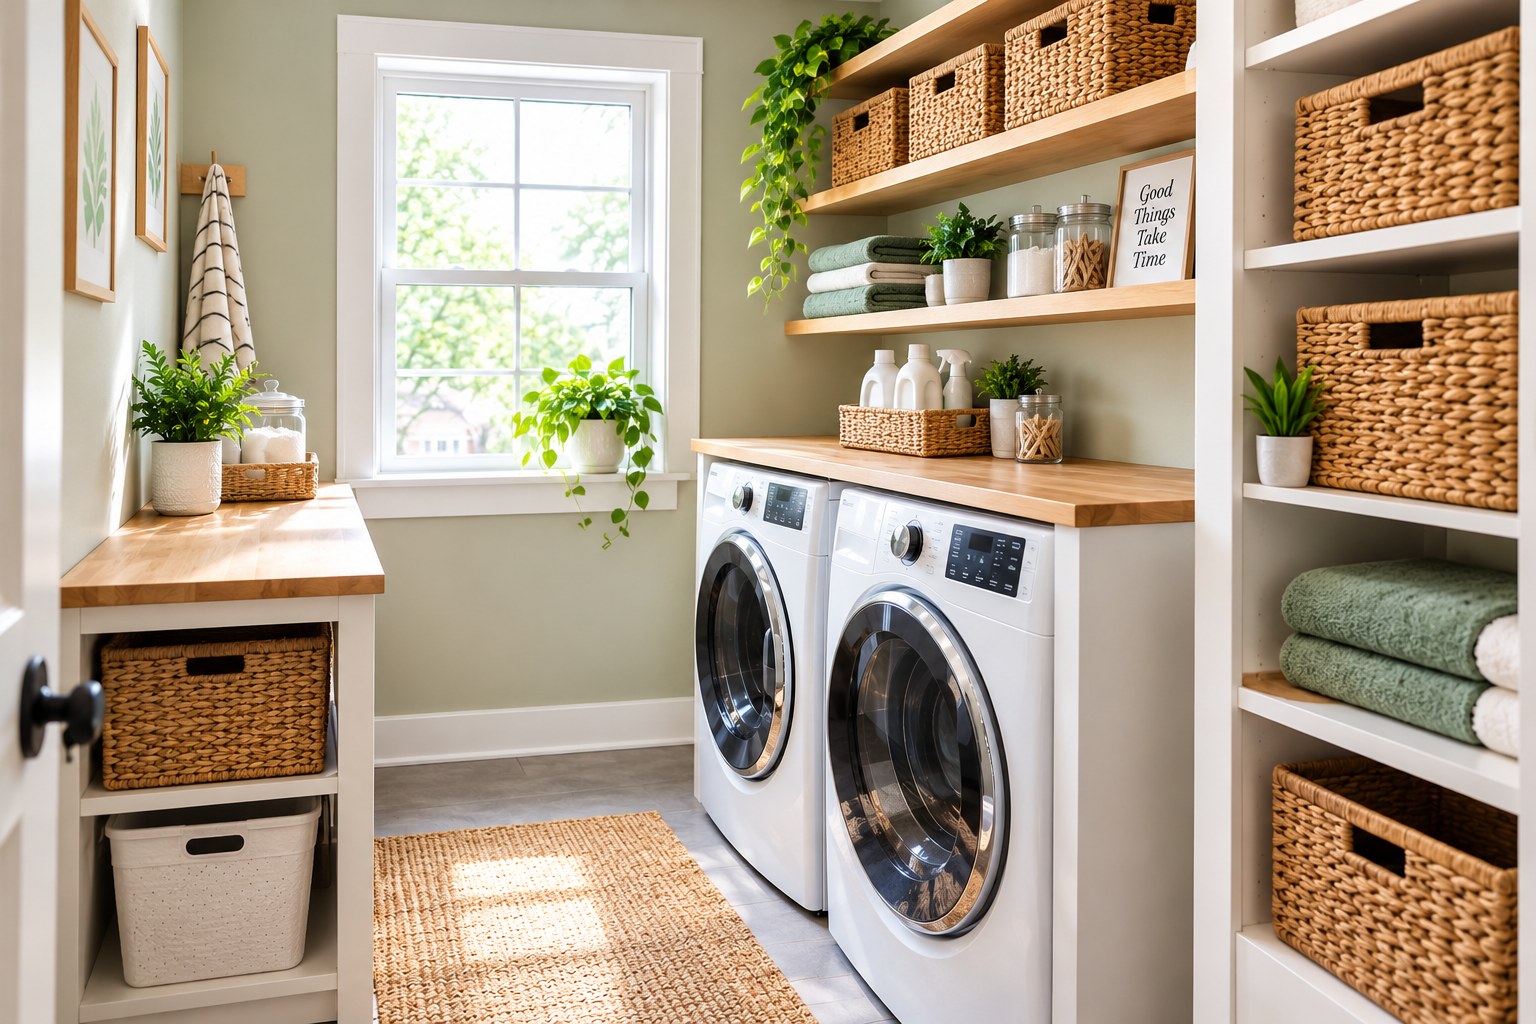
If the appliances are front-loading, a properly supported shelf or countertop can provide a folding surface. Leave adequate clearance for detergent drawers, controls, doors, and routine appliance maintenance.
Think about vertical storage in layers:
- Lower level: daily detergent and laundry bags
- Middle level: towels, cloths, and small baskets
- Upper level: backup or seasonal supplies
Do not fill every shelf to its maximum capacity. A little empty space makes the contents easier to see and gives you room to remove an item without pulling down three others.
If you rent, a freestanding narrow shelf may be more practical than a permanent installation. If you mount a shelf, use hardware appropriate for the wall construction and the expected load. Storage should never interfere with ventilation, electrical access, plumbing, or appliance safety.
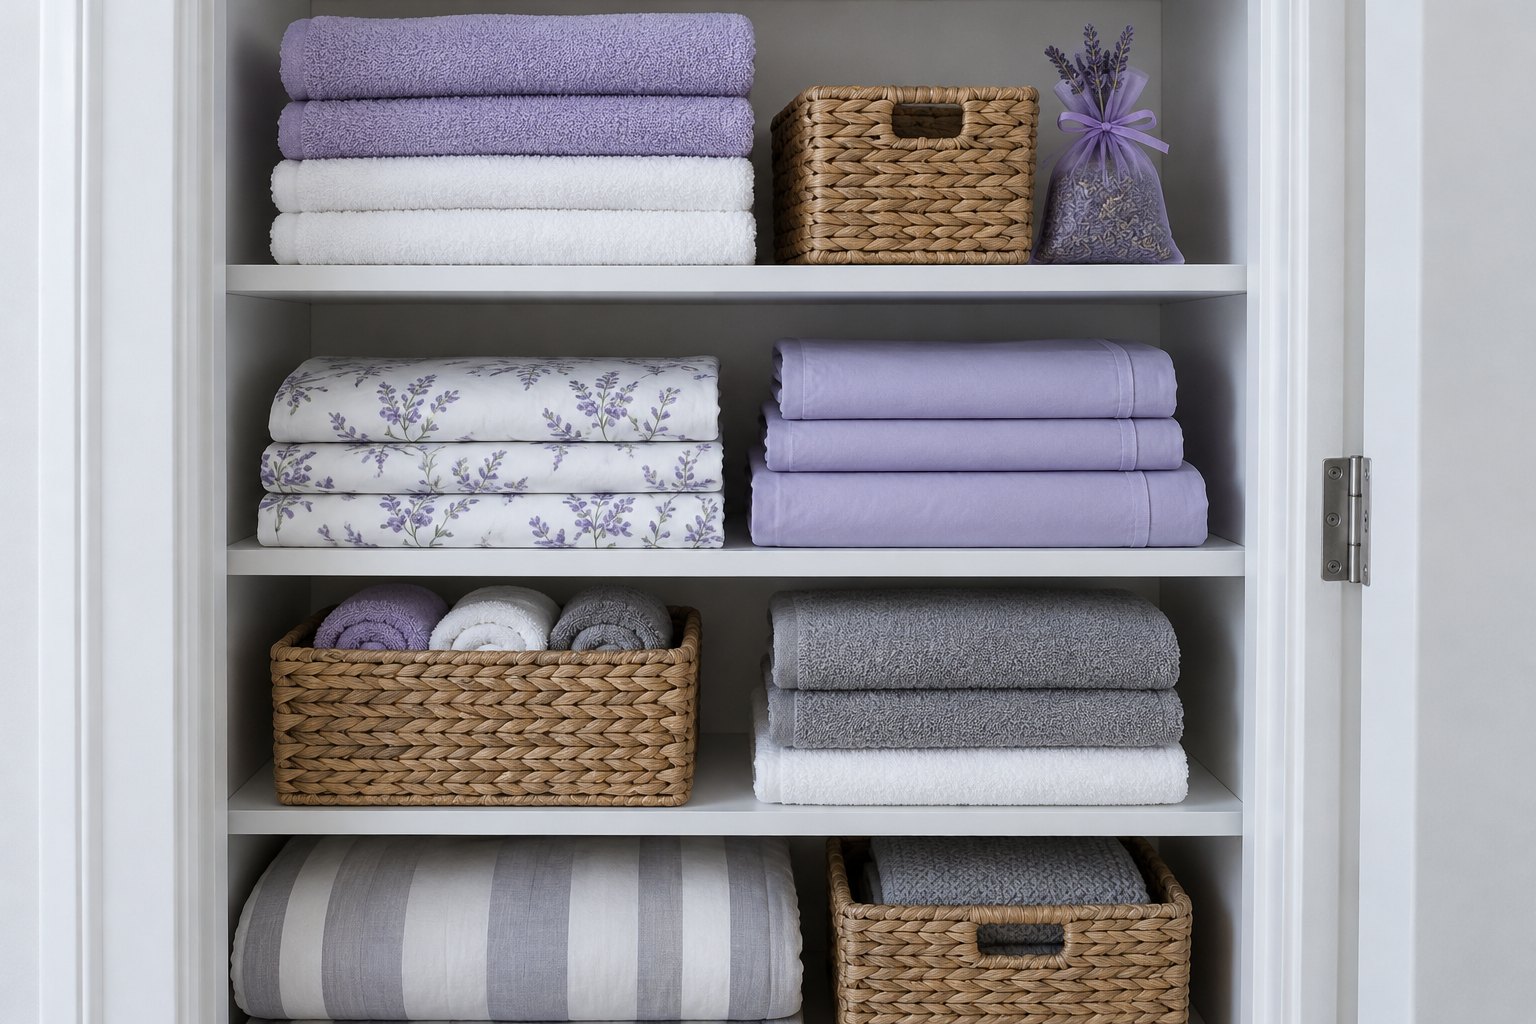
For another room where vertical storage matters, see linen closet organization for small shelves .
4. Give Every Basket One Clear Job
Baskets work best when they solve one specific problem. They become clutter when they are simply places to throw anything that does not have a home.
Give each basket a narrow purpose, such as:
- Lost socks
- Laundry bags
- Cleaning cloths
- Items waiting to be put away
- Towels
- Empty packaging awaiting recycling
Use labels if two containers look alike. A short label such as “Towels” or “Laundry Bags” is enough.
For a narrow laundry room, tall and relatively narrow baskets can use vertical space without blocking the floor. Avoid very deep baskets if you have to reach around the machines to access them.
A useful addition is one small reset basket. During the week, place anything that does not belong in the laundry room inside it. During the weekly reset, return those items to their proper rooms. This keeps random objects from spreading across the machines and shelves.
The important test is not whether the baskets match. It is whether everyone in the home can understand what belongs in each one.
5. Keep Daily Laundry Supplies Visible but Controlled
Laundry products often create visual clutter because bottles vary in size and shape. You do not need to decant every product to make the room organized.
Instead, create one defined daily-supply area. A shallow tray or open bin can hold the detergent and other products you use most often. The tray creates a boundary so bottles do not slowly spread across a counter or appliance top.
Store backup supplies separately. If you have several unopened bottles, keeping all of them beside the washer makes the daily work zone larger without making laundry easier.
For small accessories such as stain sticks, mesh bags, dryer balls, or clothespins, use a small container inside a drawer or basket. This prevents tiny items from disappearing into a deep storage bin.
Follow product labels for storage and handling. The EPA’s Safer Choice program is also a useful reference when you want to research cleaning products that meet its voluntary criteria for safer ingredients.
The organization principle is straightforward: keep the items used every load close to the machines, and move rarely used supplies higher or farther away.
6. Build One Clear Folding Surface
If your laundry room has no counter, you do not necessarily need a large renovation.
A sturdy, appropriately supported shelf can provide a useful folding surface. A purpose-built countertop above front-loading machines can work well when the installation leaves the appliances accessible and does not interfere with controls, doors, ventilation, or manufacturer requirements.
The most important rule is:
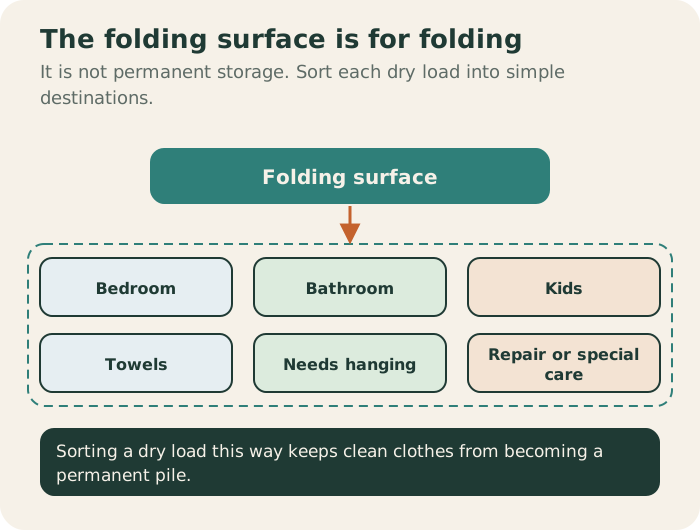
The folding surface is for folding, not permanent storage.
When a load is dry, sort it into simple destinations:
- Bedroom
- Bathroom
- Kids
- Towels
- Items that need hanging
- Items that need repair or special care
This prevents clean laundry from becoming a permanent pile.
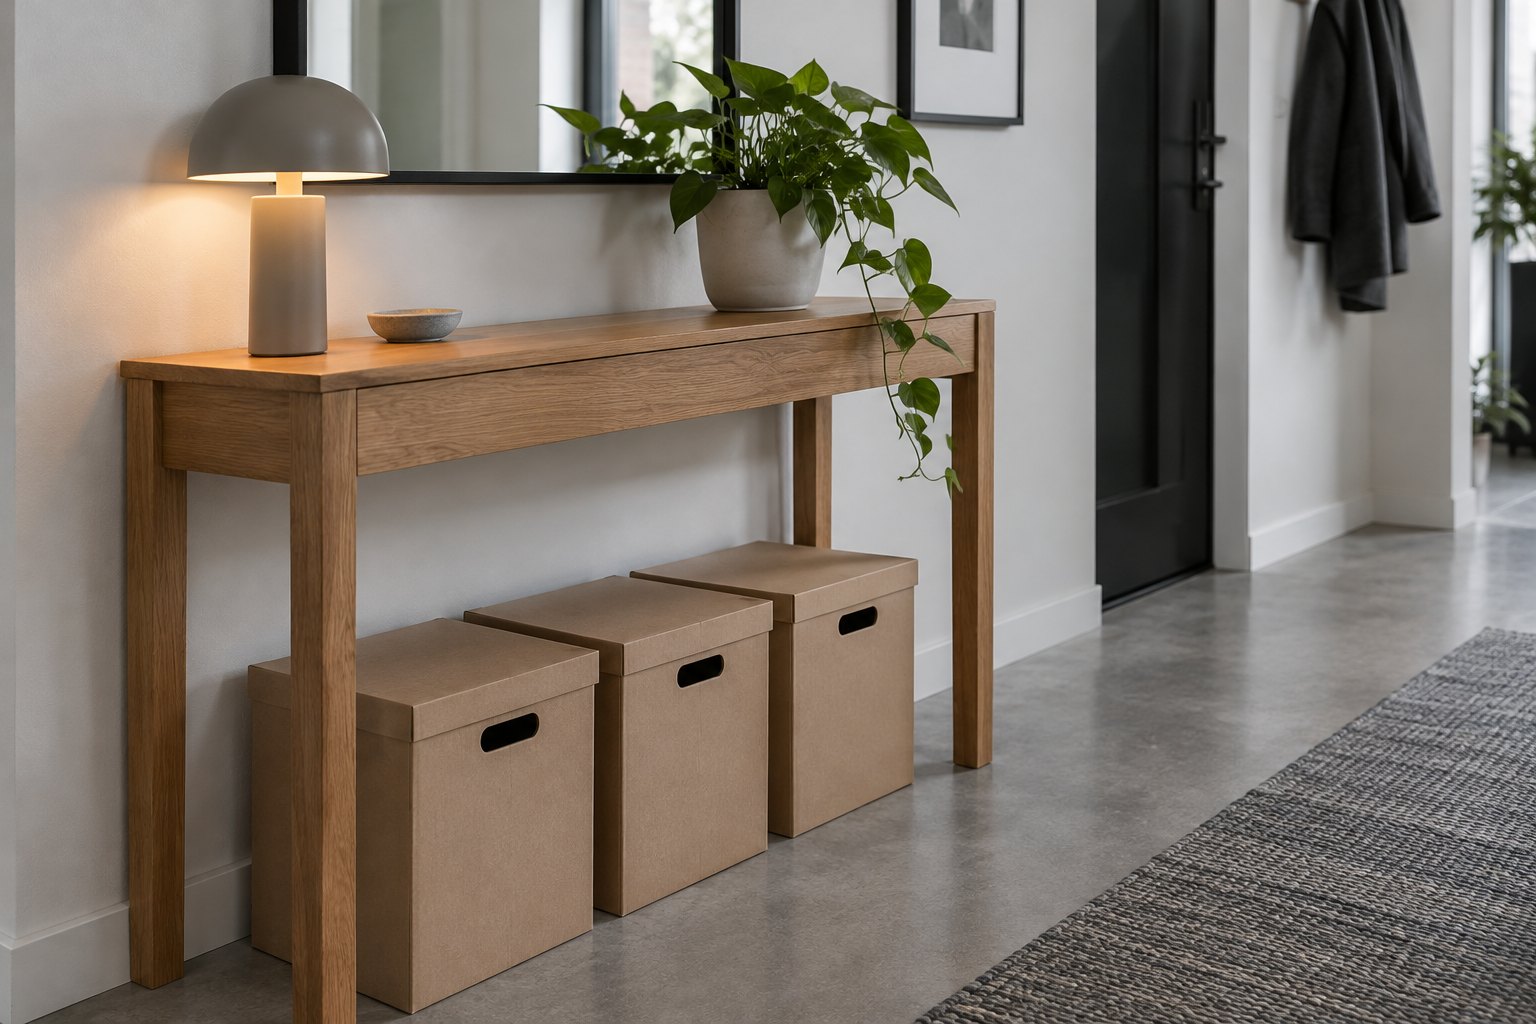
If your laundry room is connected to another compact area, the same principle used in narrow entryway organization applies: give the surface one primary job and keep temporary items moving instead of letting them become permanent storage.
7. Create a Temporary “Problem Basket”
Some laundry items do not fit neatly into the normal routine: a missing sock, a garment waiting to air-dry, a shirt needing repair, or something that belongs in another room.
Instead of leaving these items on top of the dryer, create one small problem basket.
Its purpose is temporary storage only. Once a week, empty it completely:
- Match loose socks.
- Move clothes that belong elsewhere.
- Hang items that need air drying.
- Set aside repairs.
- Return anything that has finished its temporary job.
This is especially useful in a small room because it prevents one unfinished task from spreading into every available surface.
If the basket is always full, that is useful information. It may mean the system needs a permanent home for one category, rather than another temporary container.
8. Use the Door for Lightweight Accessories
The back of the laundry-room door can provide storage without taking floor space.
An over-door organizer can hold lightweight items such as:
- Laundry bags
- Cleaning cloths
- Gloves
- Clothespins
- Small garment-care accessories
- Spare sponges
Keep heavy bottles and large containers elsewhere. A door organizer should not become a wall of cleaning products.
Before installing one, check that the door still closes properly and that the organizer does not hit shelving, handles, or appliances.
For a very narrow room, this can be more useful than adding another floor-standing cabinet. The objective is to reclaim a surface that is already there rather than make the walking path smaller.
The same rule applies to hooks: use them for items that are genuinely easier to hang, not as a place to accumulate every object that enters the room.
9. Turn Narrow Gaps Into Useful Storage
A gap beside a washer, dryer, or cabinet can be useful, but only if its dimensions allow the storage to remain practical.
Measure the gap at several points because walls, trim, hoses, and baseboards can make the usable width smaller than it appears.
A narrow rolling cart can work for lightweight supplies if it can be pulled out easily. A fixed slim shelf may be better when the gap is rarely accessed.
Before filling the space, check:
- Hose clearance
- Electrical access
- Appliance vibration
- Door swing
- Ventilation
- Cleaning access
- Ability to remove the appliance if service is required
Do not use every gap simply because it exists. A little empty space can make a small laundry room easier to clean and maintain.
For another practical approach to using awkward dimensions, see small bedroom storage ideas with pull-out space .
10. Separate Everyday Supplies From Backups
A small laundry room becomes crowded quickly when everyday products and reserve stock share the same work zone.
Use a simple two-level system.
Daily level: detergent, laundry bags, stain-treatment product, and the cloths or accessories used most often.
Backup level: unopened detergent, extra sponges, spare bags, seasonal products, and items used only occasionally.
The backup level can be a higher shelf, a closed cabinet, or a labeled bin outside the main working area.
Do not buy more storage just to hold duplicates. First check whether the duplicates are necessary. A small room benefits from a short inventory list because it reduces the chance of buying another product you already have.
If you want to apply the same “daily versus backup” principle elsewhere, our renter-friendly closet organization guide uses a similar approach to keeping frequently used items accessible.
11. Keep the Floor and Appliance Tops Clear
The floor is valuable working space in a small laundry room. Keep it as open as possible so you can move, clean, and access the appliances.
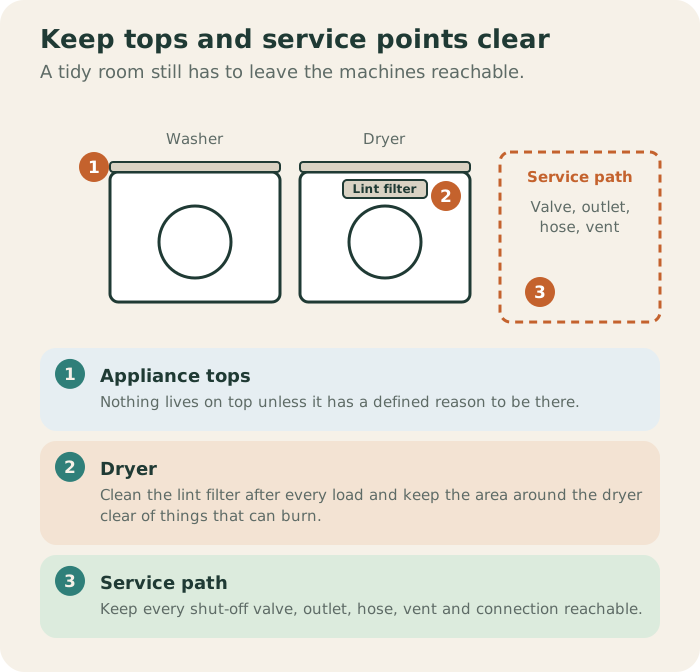
Avoid turning the tops of machines into permanent shelves. A temporary item may be harmless, but repeated piles quickly become a second storage system that is difficult to maintain.
A simple rule is:
Nothing lives on the appliance top unless it has a defined reason to be there.
At the end of a laundry session, return supplies to their zone and move clean clothes to the folding or temporary area.
If you use a dryer, keep the lint filter and surrounding access clear enough for routine cleaning. ENERGY STAR recommends cleaning the lint filter after every load as part of dryer efficiency and safety practices. See its clothes dryer guidance for additional laundry efficiency and maintenance information.
The National Fire Protection Association also advises keeping the area around the dryer clear of things that can burn, such as boxes, cleaning supplies and clothing.
The goal is not an empty-looking room. It is a room where the important maintenance points remain accessible.
12. Make the Weekly Reset Take Less Than 10 Minutes
Organization lasts when maintenance is easier than creating the mess.
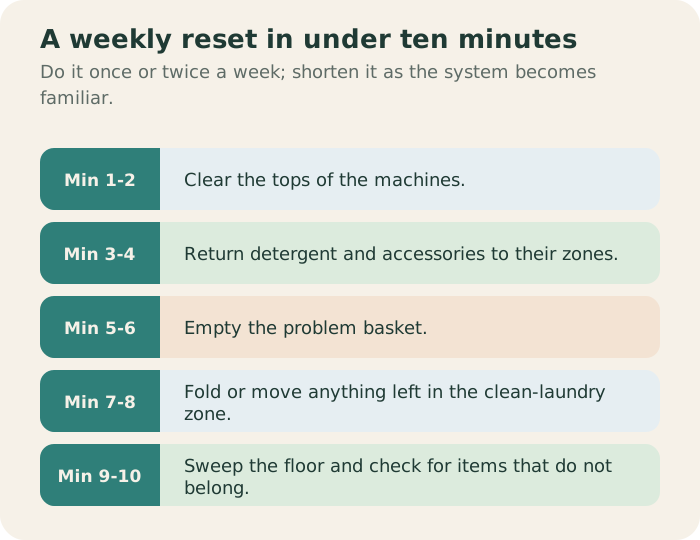
Try this short reset once or twice a week:
Minute 1–2: Clear the tops of the machines.
Minute 3–4: Return detergent and accessories to their assigned zones.
Minute 5–6: Empty the problem basket.
Minute 7–8: Fold or move anything left in the clean-laundry zone.
Minute 9–10: Sweep the floor and check the room for items that do not belong.
You can shorten the routine after the system becomes familiar.
The key is consistency. A ten-minute reset is easier to repeat than a large cleaning session every few weeks. If one step is repeatedly difficult, change the storage location rather than adding more rules.
13. Choose Storage Based on the Room You Actually Have
There is no single perfect laundry-room layout.
For a front-loading washer and dryer, a counter or shelf above the machines can combine folding and vertical storage.
For stacked appliances, use the freed floor area for a slim hamper or tall shelving while keeping daily supplies within comfortable reach.
For a side-by-side layout, use the wall above the machines and consider a narrow folding surface between or beside the appliances if clearance allows.
For a laundry closet, prioritize shallow storage, a door organizer, and a clear service path. Avoid deep cabinets that make the machines difficult to reach.
For a shared laundry room, use clearly labeled personal baskets and keep common supplies separate from individual items.
The best setup follows the room’s constraints instead of trying to copy a photograph exactly.
14. Avoid the Most Common Small Laundry Room Mistakes
Buying storage before measuring
This creates awkward gaps, blocked doors, and organizers that are too deep.
Filling every shelf
A shelf is not more useful when it is packed so tightly that nothing can be removed easily.
Using too many baskets
Every basket should have a purpose. If you cannot explain what belongs inside it, you may not need it.
Keeping backup products in the main work zone
Reserve supplies make the room look fuller without helping with today’s laundry. Move them to a separate storage level.
Letting the machines become a permanent countertop
Machine tops are tempting, but constant piles make the room harder to clean and can interfere with routine access.
Creating a complicated sorting system
A six-category system may look impressive but can be difficult to maintain. Start with the smallest number of categories that genuinely helps your household.
Ignoring the service path
Do not install a storage unit that makes it difficult to reach a shut-off valve, outlet, hose, vent, or appliance connection.
15. A Simple Layout for an Extremely Small Laundry Room
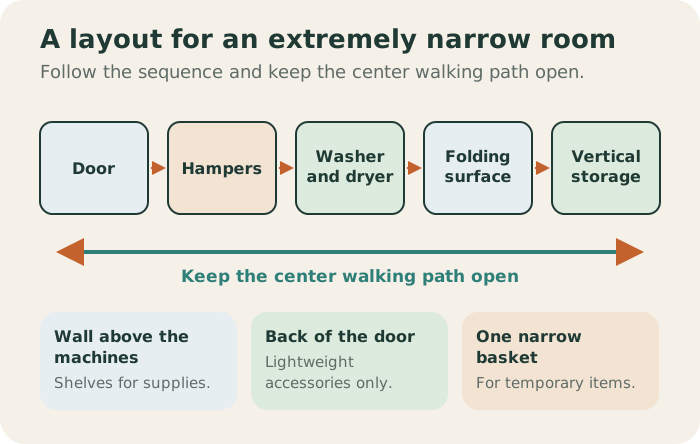
If your room is only a few feet wide, start with this sequence:
Door → hampers → washer/dryer → folding surface → vertical storage
Keep the center walking path as open as possible.
Use the wall above the machines for shelves, the door for lightweight accessories, and one narrow basket for temporary items. Frequently used supplies should stay around comfortable reach height, while light backup supplies can move higher.
If the machines are stacked, use the freed floor area for one narrow hamper or shelving unit. Do not automatically fill the entire footprint; the extra clearance can make cleaning and maintenance much easier.
16. Final Checklist Before You Add Anything
Before buying another organizer, ask:
- Have I measured the room?
- Can every appliance door open fully?
- Is the main walking path clear?
- Does every basket have one job?
- Are daily supplies within easy reach?
- Are backup supplies stored separately?
- Do I have one clear folding area?
- Is there a temporary home for problem items?
- Can I reach plumbing, vents, outlets, and service points?
- Can I reset the room in ten minutes?
- Am I solving a real problem, or just filling an empty shelf?
If the answers are mostly yes, you probably do not need more storage. You need to keep the system simple.
A well-organized laundry room should make laundry more predictable, not create another project to manage. Measure first, assign clear zones, use vertical space carefully, keep maintenance access open, and make the reset routine short enough that you will actually repeat it.
Frequently Asked Questions
How should I start organizing a small laundry room?
Measure the room first and identify the main work zones: dirty laundry, washing supplies, clean laundry, and folding. Keep the walking path clear before adding storage. Test the layout with items you already own, then add only the containers or shelves that solve a specific problem.
What should I measure before buying laundry room storage?
Measure room width and depth, the space above and beside the machines, door swings, drawer clearances, and the distance needed to open appliance doors fully. Also note outlets, vents, water connections, trim, and service access.
How many storage zones does a small laundry room need?
Three or four broad zones are usually enough: daily laundry supplies, dirty or sorting laundry, clean laundry waiting to be folded, and backup supplies. Start with the fewest categories that match your routine.
How can I keep a small laundry room organized after cleaning it?
Give frequently used items predictable homes and use a short weekly reset. Return supplies to their zone, empty temporary baskets, clear the folding surface, and sweep the floor. If an item repeatedly ends up somewhere else, change its storage location instead of adding another container.
Should I buy baskets and containers before organizing a laundry room?
Usually not. Measure the space and decide what each zone needs to hold first. Then choose containers that fit the actual shelf, drawer, or floor area. Buying containers before measuring often creates wasted gaps or oversized baskets.
What should I store on the highest shelves in a small laundry room?
Use the highest shelves for light, infrequently used items such as seasonal supplies, spare laundry bags, or backup products. Keep everyday detergents, cloths, and sorting baskets at comfortable reach heights so the routine remains quick and safe.
Related Organization Guides
- Small Apartment Organization: Maximize Storage in a 350-Square-Foot Home
- Linen Closet Organization Ideas for Small Shelves
- Narrow Entryway Organization: Build a Practical Drop Zone
- Small Bedroom Storage Ideas With DIY Pull-Out Space
- Renter-Friendly Closet Organization Using Adhesive Storage
- Small Bathroom Organization Ideas for Practical Space
Sources
- ENERGY STAR, Clothes Dryers (no date shown): clean the lint filter after every load, also an important safety measure.
- U.S. EPA, Safer Choice (last updated September 22, 2026): the program for cleaning and other products with safer ingredients.
- National Fire Protection Association, Clothes Dryer Safety tip sheet (© 2018): clean the lint filter before or after each load; keep the area around the dryer clear of things that can burn.
Image Credits
All six diagrams in this guide are original illustrations drawn for this article. Apart from the AI-generated cover, the guide uses no photographs or third-party artwork.
- Cover: AI-generated image via ChatGPT, October 2026.