No laundry room does not mean no laundry system. In a small apartment the washing may happen somewhere else (a building laundry room, a laundromat or a stacked unit tucked into a closet), but the rest of the job lands in your living space: a pile waiting to be washed, wet clothes that need hours to dry and clean laundry waiting to be folded. Without a plan, that spreads across the bedroom chair, the sofa arm and the bathroom door.
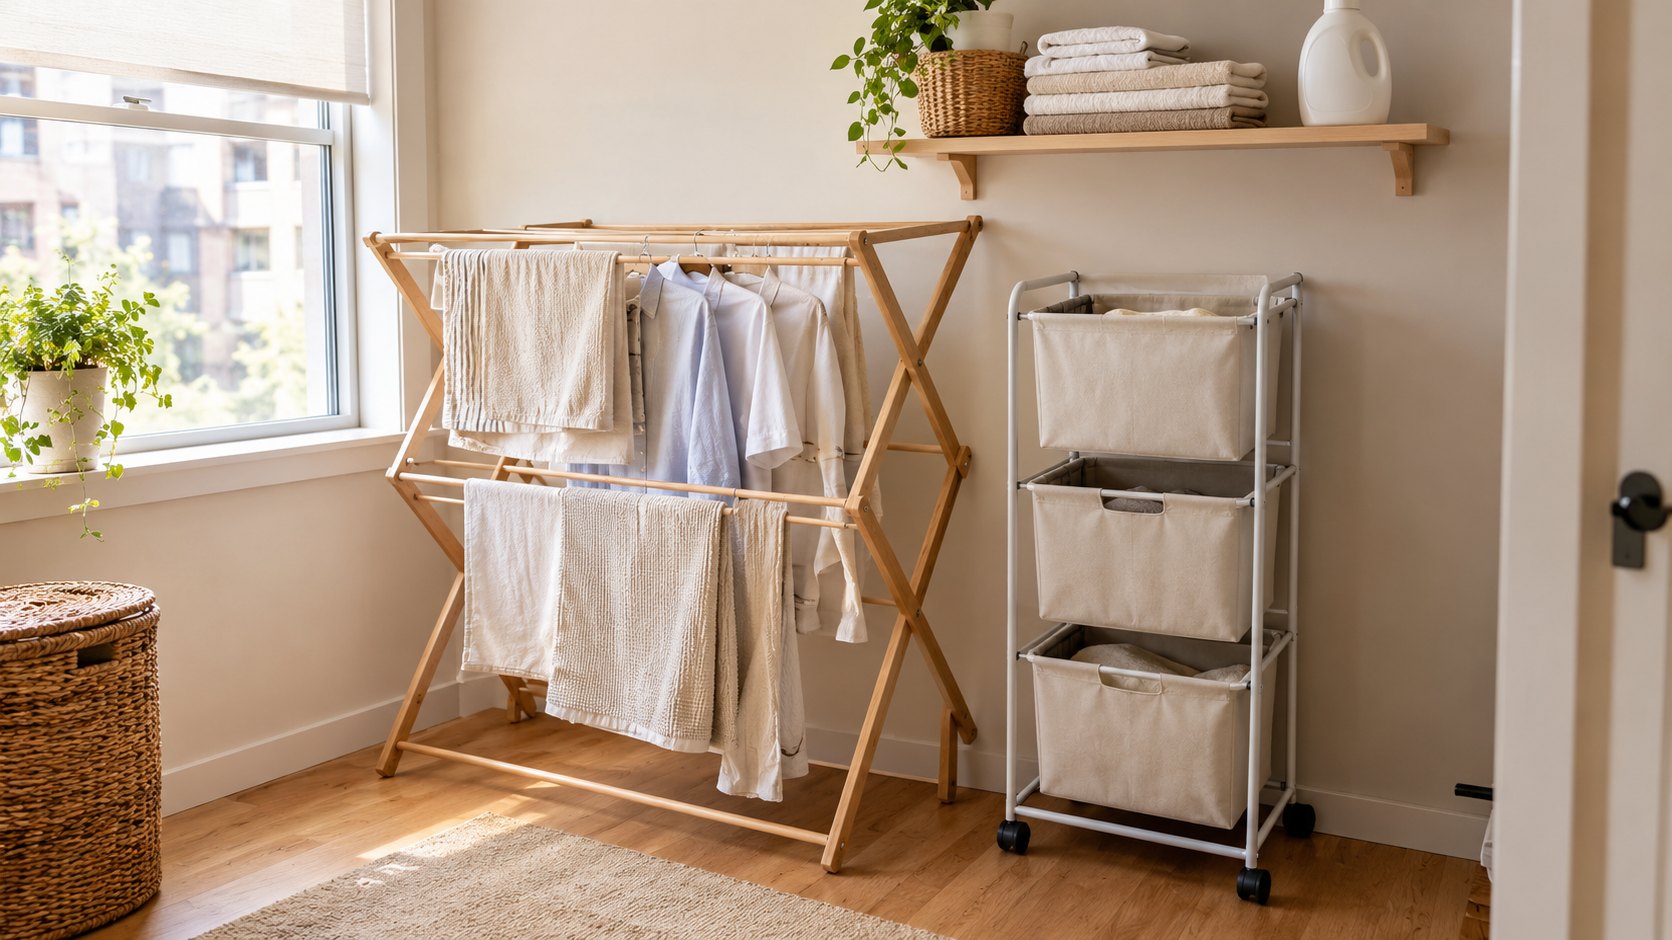
This guide builds one compact station for those three stages. It uses a folding drying rack, a rolling three-tier cart and one wall shelf, like the setup in the cover photo, and it adds what photos rarely show: how much floor space the station needs, where wet laundry can dry without raising the humidity of the room you sleep in, and where to keep supplies within easy reach. If your apartment does have a small laundry room, our small laundry room guide covers shelves and supplies for that space instead.
1. Split the Job Into Three Stages
Every load of laundry passes through the same three stages, whether you wash at home or not:
- To wash: dirty clothes waiting for a load.
- To dry: wet clothes that need air.
- To fold: dry clothes that still need to be put away.
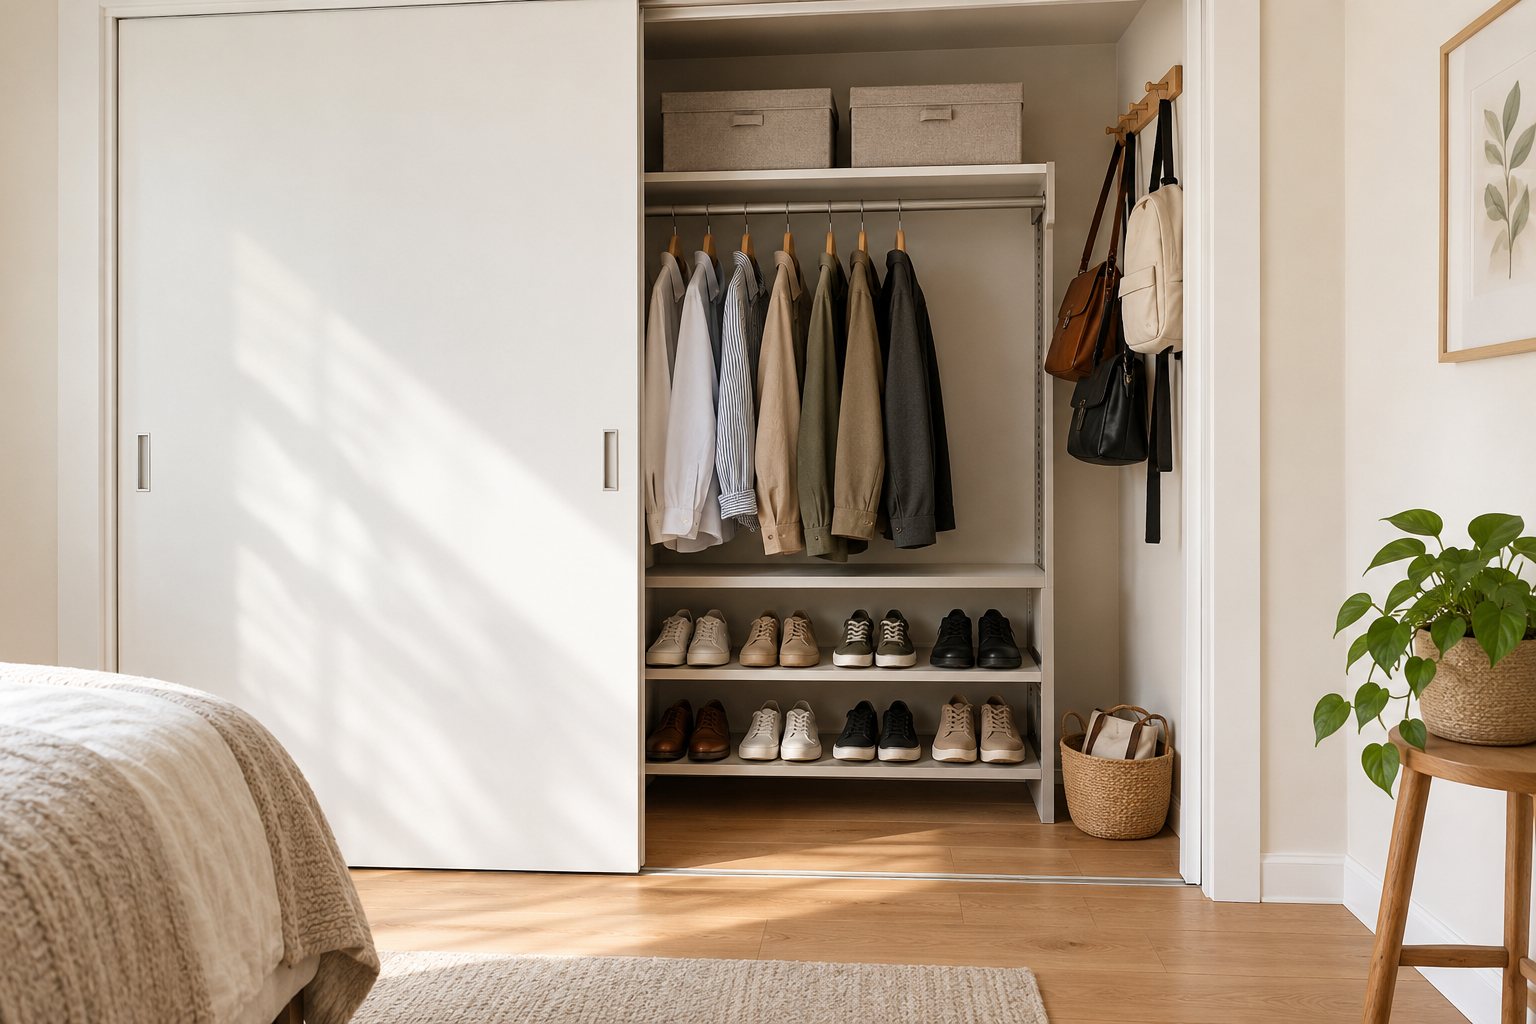
A small apartment does not need a room for this. It needs one place for each stage, close together and clear of the places where you eat and sleep. The cart takes care of the first stage, the rack the second and a flat surface the third. If each stage has a fixed home, the pile on the chair has nowhere to start.
2. Budget 30 by 48 Inches of Floor Space
Start with the floor, not the furniture. The ADA Standards for Accessible Design use a clear floor space of 30 by 48 inches as the space needed for one person to stand or position themselves at an object. It is a planning reference for accessible design, not a rule for your home, but it is a useful size for a laundry station: enough room to stand, bend to the cart and turn with a basket.
Mark that rectangle with painter’s tape next to the wall where the rack and cart will live. Then check the walkway. The same standards set a minimum clear width of 36 inches for walking surfaces, so keep the station beside the main path, never inside it. If the rack is open and the walkway drops below 36 inches, you will bump it every day and eventually stop using it.
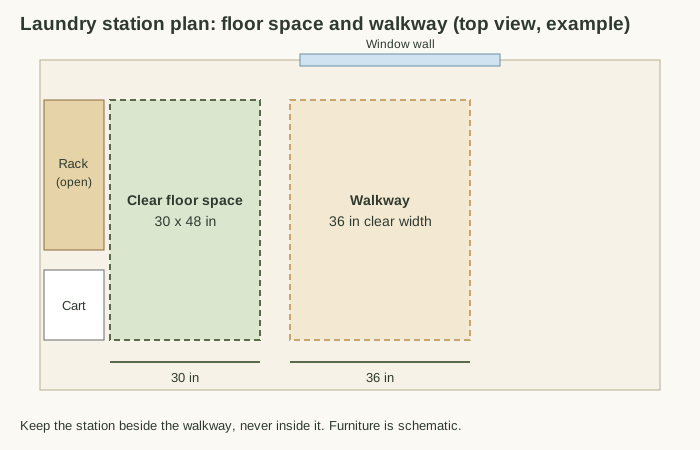
If the apartment has no spot with that much free floor, shrink the station rather than blocking the path: a slim rack, a narrow cart and a shelf can share one wall, and the 30 by 48 inches can overlap with floor you already keep clear.
3. Choose the Drying Spot by Moisture, Not Looks
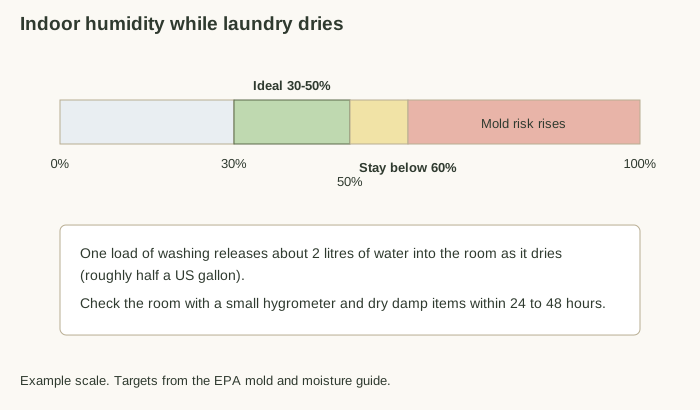
Wet laundry is a humidity source. A social housing guide on drying clothes indoors estimates that drying a load of washing releases about 2 litres of water into the home, roughly half a US gallon. The US EPA recommends keeping indoor humidity below 60 percent, ideally between 30 and 50 percent, to avoid mold. A rack of towels in a closed room can push a small apartment past that.
Use these rules to pick the spot:
- Not the bedroom. The same guide advises against drying clothes in bedrooms because people add moisture to the air while they sleep.
- Prefer a room with an exhaust fan, such as the bathroom or kitchen, and close the door so the moisture stays in the room with the fan.
- Use a window. If the best spot is in a living area, place the rack near a window you can open a little, in the sun if possible.
- Measure instead of guessing. A small hygrometer costs little and tells you whether the room stays under 60 percent while the rack is loaded.
4. Load the Rack So Air Can Move
How you load the rack matters as much as where it stands. Run the washer on its highest spin setting first, because less water in the clothes means less water in the air. Then:
- Leave space around the rack so air can circulate, and do not overload it.
- Spread items out instead of layering them, and keep heavy pieces such as towels and jeans on the outer bars.
- Turn items halfway through drying.
- Keep the rack a hand’s width away from the wall. This is a rule of thumb, not a standard, but a rack pushed flat against a wall traps damp air behind it.
The EPA guide advises drying damp items within 24 to 48 hours to prevent mold growth. If something is still damp after two days, rewash it, spread it out more or move the rack to a better-ventilated spot. When the rack is empty, fold it flat and store it behind a door or in the gap beside the wardrobe so it never becomes a permanent piece of furniture.
5. Sort in a Three-Bin Cart
A rolling cart with three fabric bins keeps the first stage tidy and gives the sorting a fixed home. Choose bin categories that match how you wash, for example delicates, everyday clothes, and towels and bedding. Sorting as you undress means wash day starts with loads that are already separated.
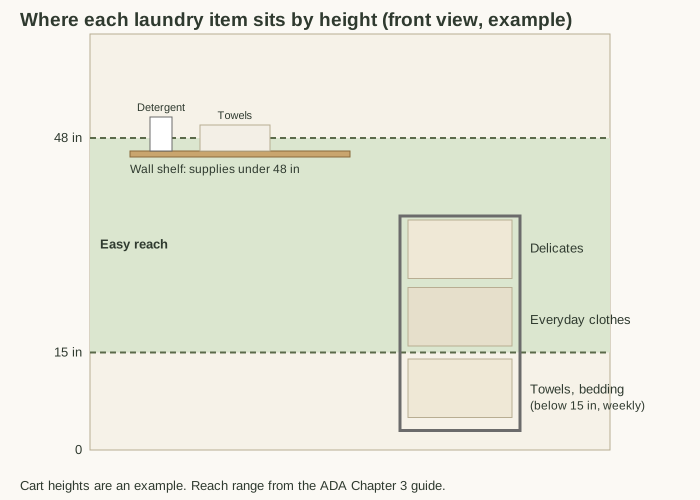
Put the bins where you can reach them. The ADA Chapter 3 guide gives an unobstructed forward reach range of 15 to 48 inches. Use the top two bins for what you handle most often and the bottom bin, which sits below 15 inches, for the bulky items you only touch once a week, such as towels and sheets. Wheels let you park the cart against the wall and pull it out only on wash day.
The wicker hamper in the cover photo is a good overflow for a week of bedding, but keep any basket that holds damp items out of closed cabinets and away from the drying area. Damp towels in a lidded basket go musty quickly.
6. Keep Supplies on a Shelf You Can Reach
One wall shelf above the station is enough for detergent, stain remover, a lint roller and a stack of clean towels. Mount it so the supplies you lift every week sit under 48 inches, which keeps the heavy bottle within the easy reach range. The shelf in the cover photo is higher than that for the sake of the picture; in daily use, keep the bottle lower and put only light, folded towels on the high part of the shelf.
If the shelf is above the rack, leave enough clearance that wet clothes never touch what is stored on it. If you rent, fasten the shelf to wall studs or use a heavy-duty rail system as your lease allows, and never trust a shelf with adhesive strips alone for a full detergent bottle.
7. Fold Once, at a Flat Surface
The third stage is where piles usually return. Fold straight off the rack at any flat surface you already have, such as a dining table or the made bed, and carry the folded stacks to their shelves in one trip. Folding standing up, near the rack, is faster than carrying everything to the bedroom first.
Put away immediately. A clean basket sitting on a chair counts as a pile. If something does not have a home, that is a signal to look at the storage, not at the laundry: our small closet guide shows how to give clothes fixed heights and places.
8. Run a Weekly Rhythm
A small station works only if it holds one or two loads at a time. Use that limit as the rule: if the rack is full, the next load waits. Wash on the same day each week, run one load, dry it, fold it and put it away before you start the next. The cart then never overflows, and the rack is empty and folded by the end of the day.
If you share the apartment, give each person a bin or divide the cart by category, and agree on who folds what. A station that two people can read at a glance needs fewer reminders.
9. Common Mistakes in a Laundry Station Without a Laundry Room
- Drying in the bedroom. It raises moisture where you sleep.
- Blocking the walkway. An open rack that narrows the path below 36 inches gets moved, then abandoned.
- Overloading the rack. Clothes layered on each other take longer to dry and can smell musty.
- Leaving damp items in a basket. Moist laundry left for days invites mold.
- Storing heavy detergent on a high shelf. Keep it under 48 inches.
- Letting the rack live open. Fold it when it is empty so the room works for the other 150 hours of the week.
10. Try This Weekend
- Tape a 30 by 48 inch rectangle on the floor beside a wall, away from the main path, and check that a 36 inch walkway remains.
- Choose the drying room: not the bedroom, ideally with a fan or an openable window.
- Place a hygrometer in that room and note the reading before and during a load.
- Set up the cart with three labeled bins and move the bulky items to the bottom bin.
- Mount or place a shelf so detergent sits under 48 inches.
- Run one load, dry it on the rack within 48 hours, fold it at a flat surface and put it away.
For the bathroom side of the same problem, see our small bathroom guide , and for a studio where space is tight everywhere, our 350-square-foot studio plan shows how to plan the walking path first. Cleaning supplies also fit in the cabinet below the sink: see under-sink organization .
Frequently Asked Questions
Where can I dry laundry in a small apartment without a laundry room?
Choose the room with the best ventilation where you spend the least time. A bathroom or kitchen with an exhaust fan and the door closed is the usual first choice. Otherwise use a living area near a window you can open a little. Avoid the bedroom, because people add moisture to the air while they sleep.
How much floor space does a laundry station need?
Plan a clear floor space of about 30 by 48 inches beside the rack and cart, a size the ADA Standards use as a planning reference, and keep it outside a 36-inch walkway. If you cannot spare that much, shrink the furniture rather than blocking the path.
Is it safe to dry clothes indoors?
Yes, if you control moisture. Drying a load releases about 2 litres of water into the home, and the EPA recommends keeping indoor humidity below 60 percent, ideally 30 to 50 percent. Ventilate the room, do not overload the rack and check the room with a hygrometer.
How long should clothes take to dry on a rack?
The EPA guide advises drying damp items within 24 to 48 hours to prevent mold growth. If something is still damp after that, spread it out more, move the rack to a better-ventilated spot or rewash it.
How do I keep a drying rack from taking over the room?
Use a folding rack, set it up only on wash day and fold it flat when it is empty. Limit the station to one or two loads at a time: if the rack is full, the next load waits.
What should I put in a three-tier laundry cart?
Sort by how you wash. Put delicates in the top bin, everyday clothes in the middle bin and bulky towels and bedding in the bottom bin, which sits below the easy reach range and is only touched once a week.
Sources
- US Access Board, ADA Standards for Accessible Design : clear floor space of 30 by 48 inches (305.3) and a minimum clear width of 36 inches for walking surfaces (403.5.1).
- US Access Board, ADA Chapter 3: Operable Parts : the 15 to 48 inch unobstructed forward reach range.
- US EPA, A Brief Guide to Mold, Moisture and Your Home : keep indoor humidity below 60 percent, ideally between 30 and 50 percent, and dry damp items within 24 to 48 hours.
- Platform Housing Group, Drying Clothes Indoors (PDF leaflet) : about 2 litres of water released per load, avoid bedrooms, use the highest spin setting, leave space around the airer and turn clothes halfway. This is a UK housing association guide, so use it for the general method.
Related Guides
- Small Laundry Room Storage: 16 Ways to Keep Supplies Under Control
- Small Bathroom Organization Ideas: A Zone-by-Zone Plan
- 350-Sq-Ft Studio Organization: Plan the Walking Path First
Image Credits
The cover image is an AI-generated image via ChatGPT, October 2026. The three diagrams are original graphics created for this guide.